After descending stone spiral stairs and passing through the Oratory, you enter what has been reconstructed as the Throne Room of Edward I. A circular room, it is mainly empty, except for a reproduction of the Coronation Chair. An ever-present fireplace and massive candelabra, hanging from above, dominate the room. The ceiling itself is vaulted in the center and uses the interplay of dark and light stones to create a uniform pattern throughout. Like the previous rooms, this room is damp and musty – inherently cold with the staleness of the ever-ticking march of time.
Several small alcoves branch off from the circular room. One particular alcove is reached by a single stone step. The worn wooden shutters are slightly ajar, allowing the warm afternoon sunshine to stream in through the opening left by their absence. Light dances through the time-rippled panes of glass to create strange shadows on the stone benches, which project from the wall. One can almost hear giggles of courtiers as they exchange the latest gossip, as a harp plays and the court jester entertains nearby.

After exiting through the Wakefield Tower, one emerges near the Garden Tower. After the tragic disappearance of two young children, this portion of the fortress had its name changed to the Bloody Tower. The year was 1483. Edward V, twelve years old, and his younger brother, the Duke of York, disappeared from this tower after they were placed there under the protection of their uncle, known to history as Richard III. The two boys would not be seen again for almost two centuries. In 1674 the bones of two children were discovered buried beneath spiral stone stairs in the White Tower. Believing these were the two lost princes, officials had them interred in Westminster Abbey. Many would argue that their uncle had them killed and quickly buried to ensure his ascent to the throne of England. The bones were exhumed in the early twentieth century and examined by modern scientists. It was concluded that these remains might be those of the two young princes who were never allowed to grow up. Who really killed them remains a mystery for the ages.
The Bloody Tower also once served as the prison of Sir Walter Raleigh and his family during the seventeenth century. It was here that he wrote A History of the World. The dark wood desk used by Raleigh is visible as are several other pieces from this time period.
If anything, the Tower is a juxtaposition of centuries of architecture. Alongside the medieval stone towers of Wakefield Tower and the Bloody Tower is the Tudor style Queen’s House. Since this is the home of the Resident Governor, a lone guard stands watch outside. The red of his coat is reflected in the brilliant red flowers planted nearby. Although not open to the public, the richness of the exterior provides a strange contrast to the cold gray of the Tower’s other structures. This building originally served as a prison for high-ranking prisoners of the Crown. Queen Anne Boleyn spent her final days here before losing her head to a Frenchman’s sword on nearby Tower Green. Her headless ghost is rumored to haunt this area of the Tower in her never-ending search for justice.
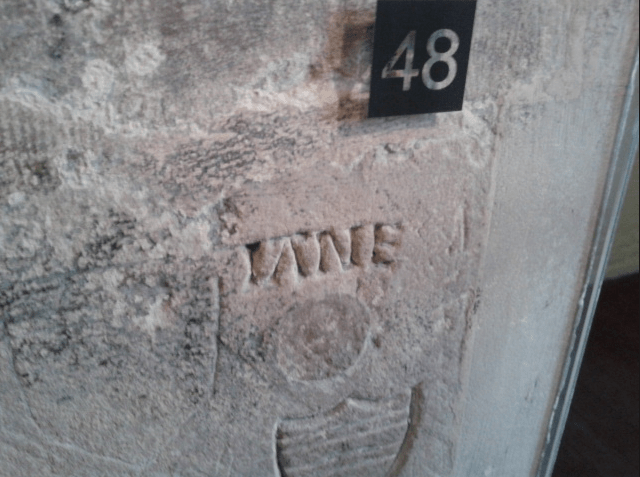
Nearby Beauchamp Tower reveals more ghosts within its walls. Used as a prison, the interior is covered in ancient graffiti. Perhaps one of the most touching and famous inscriptions scratched in the rough stone reads simply “Jane.” It was here that Guildford Dudley, the husband of Lady Jane Grey, was imprisoned to await execution after his wife’s reign as Queen of England for nine days. Lady Jane and her husband were imprisoned in the Tower of London after Jane was placed on the throne by her father-in-law John Dudley. Once “Bloody” Mary Tudor claimed the throne, she was forced to execute her sixteen-year-old cousin Jane as a means of securing her throne and her marriage to Phillip of Spain.
Guildford Dudley’s one word inscription on the walls of the Beauchamp Tower leaves no question of whom Dudley thought of during the last days of his life. It was from this tower that Jane saw her husband emerge and walk to his death on Tower Hill on a cold February day in 1554. Only a few short hours after seeing her husband’s headless body being brought back into the Tower, Jane was taken to her death on Tower Green.
…to be continued…
-cover image courtesy of Everything.com

You can’t make this stuff up, can you. I love that painting.
LikeLike
Nope – and I like the painting too. I’m glad I finally found a reason to use it!
LikeLike